
Wed 11 October 2023 in gnu-linux by Regalis
Building a powerful GNU/Linux workstation with a blazingly fast storage
It's been a while since the premiere of the latest processors for the AM4 platform. That is exactly why it could be the best moment to build a powerful workstation based on this platform (as it comes to performance + stability vs. price). PCI-e 4.0 NVMEs are cheap and have successfully passed the test of time, not to mention DDR4 memory which is widely available and also relatively cheap.
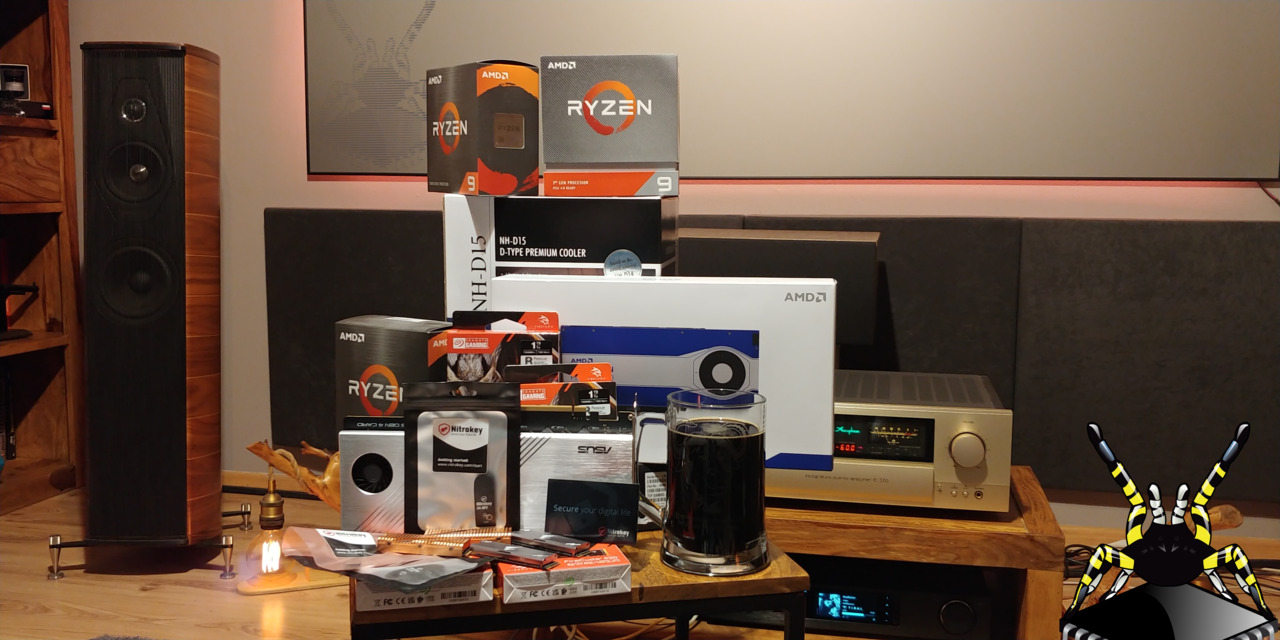
It so happens that I have some AM4-based equipment left in the lab - it is a great opportunity to start a new series about building the ultimate GNU/Linux workstation from scratch.
Have you ever wondered what really affects the speed of your computer? Is it a CPU? Or RAM? Not at all... The perceived speed of your system depends mainly on the speed of your storage. I bet you have an intuition that the feeling of using a computer with the latest processor and an old HDD would be very bad.
I will try to demonstrate how to push the speed of mass storage to its limits using a regular home PC. I can assure you that this option is much cheaper than buying a new computer with PCIe 5.0 and what's even more important - the result is much better!
The goal of this series is to present an approach that will lead to building a stable and powerful workstation capable of achieving enormous storage speeds (~30GB/s and more).
All this using Free (as in freedom) production-ready, server grade technology - GNU/Linux.
Know your hardware
Any such project should begin with familiarizing yourself with the capabilities of the equipment. The most important elements are, of course:
- the CPU,
- the chipset,
- the motherboard.
A lack of understanding the platform can lead to wrong decisions and may significantly affect the final results.
Our goal is to maximize storage speeds so we should mainly focus on the PCIe bandwidth.
CPU
Ryzen 5000 series processors based on the Zen 3 architecture from AMD have up to 24 PCI Express 4.0 lanes. Four of the lanes are reserved as a link to the chipset. Each PCIe 4.0 lane can provide a throughput of 1.969 GB/s (without the encoding overhead).
NVME drives use four PCIe lanes - we can expect maximum throughputs around 7.8 GB/s (taking into account the slight overhead - it will realistically be around 7.4 GB/s).
By using 16x PCI Express 4.0 lanes - we can achieve storage bandwidth of up to 30 GB/s.
Does this mean we can choose any Ryzen 5000 series processor? Unfortunately - NO!
Some of them will not meet our requirements at all, in particular all the so-called APU (CPU with an integrated graphics card). The same goes for some of the lower models, e.g. Ryzen 5100, Ryzen 5500 or Ryzen 5700. The reason is the lack of PCIe 4.0 lanes, instead the processors are equipped with PCIe 3.0 lanes.
Always check technical specifications!
Always check the technical specifications carefully and make sure that the CPU has an appropriate number of PCI Express lanes (of an appropriate generation).
All the below CPUs will be OK for our build:
- AMD Ryzen 5600X,
- AMD Ryzen 5600X3D,
- AMD Ryzen 5700X,
- AMD Ryzen 5800X,
- AMD Ryzen 5800X3D,
- AMD Ryzen 5900X,
- AMD Ryzen 5950X.
Chipset and motherboard
As it comes to a chipset - we basically have two options:
- AMD B550,
- AMD X570.
The X570 chipset uses four PCI Express 4.0 lanes to connect to the main CPU while B550 connects to the processor via a four-lane PCI Express 3.0 connection. What is more, the X570 chipset provides additional (multiplexed) sixteen PCIe 4.0 lanes while the B550 provides only ten PCIe 3.0 lanes.
| Chipset | CPU connection | Additional PCIe 4.0 lanes | Additional PCIe 3.0 lanes |
|---|---|---|---|
| X570 | PCIe 4.0 x4 | 16 | 0 |
| B550 | PCIe 3.0 x4 | 0 | 10 |
Please remember that regardless of the chipset - you should still have 20 independent lanes straight from your CPU.
Note!
The final connection of the PCIe lanes depends on the motherboard's manufacturer. Read the manual to determine how the manufacturer allocated the additional lanes.
PCIe bifurcation
PCIe bifurcation is a feature that allows the division of data lanes in a single PCIe slot. For example, the single PCIe x16 slot (the longest one) can be configured into two PCIe x8 lanes or even four independent x4 lanes.
PCIe bifurcation does not affect overall connection speed. The only purpose of this feature is to allow a larger slot to act like multiple smaller slots.
This is exactly what we need to connect four PCIe 4.0 NVMEs directly into the CPU via the first PCIe x16 slot in our motherboard.
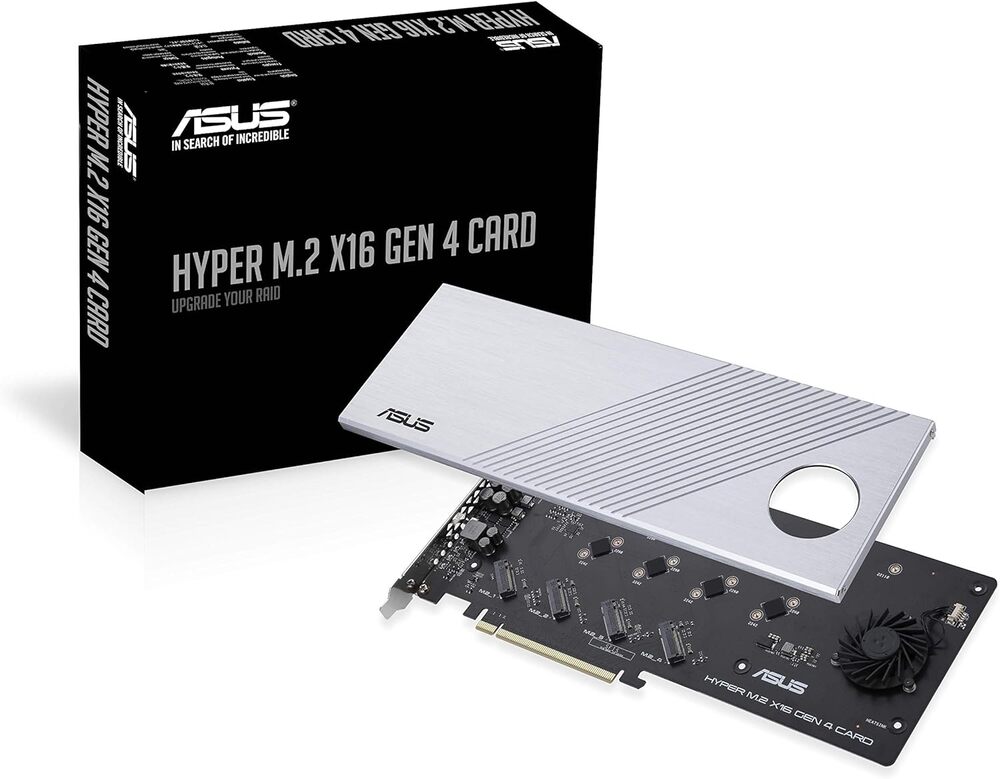
So we have another requirement for the correct selection of equipment. We need support for the PCIe bifurcation.
Warning
Always consult your motherboard's manufacturer's user manual and check whether PCIe bifurcation is supported.
In the case of ASUS - here is a list of supported motherboards divided by chipset and bifurcation modes.
My choice of the motherboard
Since I have the ASUS TUF X570-PLUS laying around - I will go with it for this build.
Warning
This article is not sponsored and I am not affiliated with ASUS in any way.
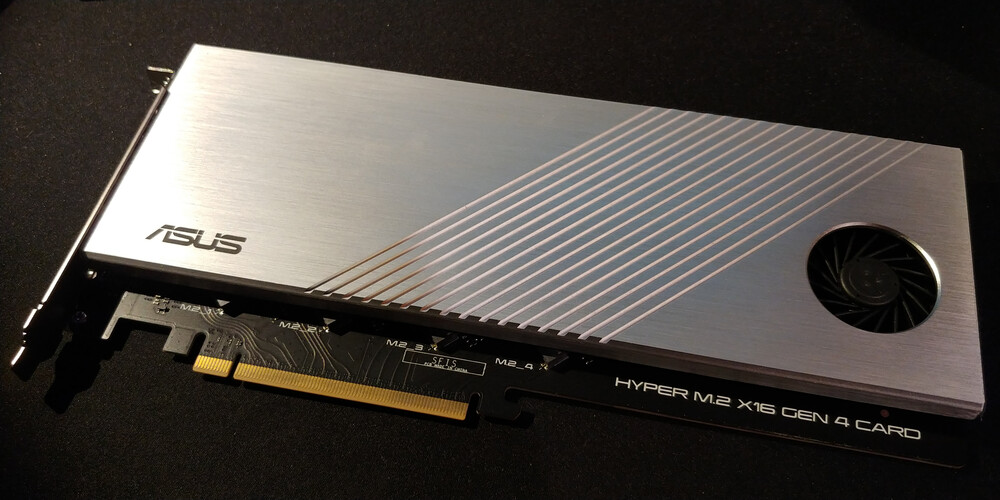
We will use the first PCIe x16 slot (marked as the PCIEX16_1) configured for
bifurcation (mode x4/x4/x4/x4) as in the picture below.

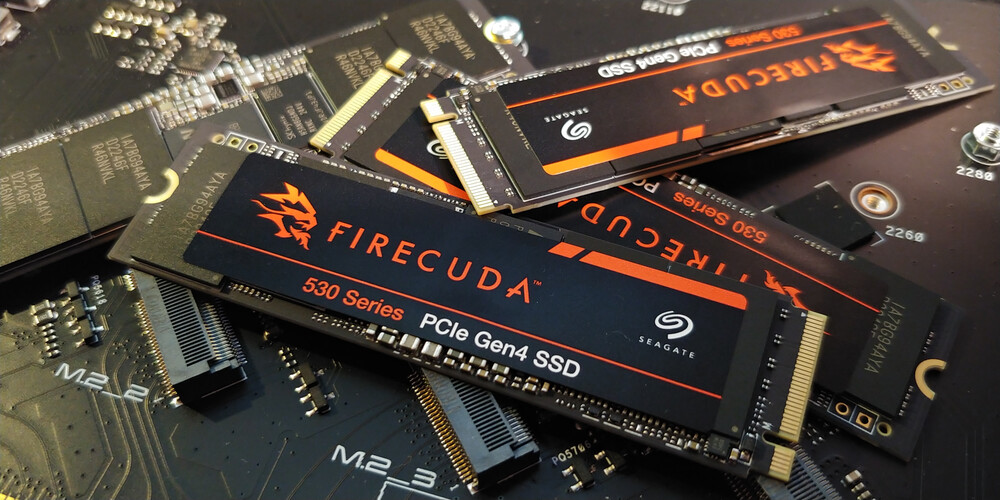
Selecting NVME drives
I have decided to go for the Seagate FireCuda 530 1TB (four of them). This is my first time building a new system without Samsung's NVME drives and there are a few specific reasons for this.
First of all, Samsung had very serious problems when introducing theirs flagship models. Secondly, Seagate provides better tools - for example they have released a freedom-respecting, MPL-licensed cross platform utilities useful for performing various operations (like firmware update) on SATA, SAS, NVMe and USB storage devices.
Here are some of the most interesting data about the drives I chose:
- Sequential Read: 7300 MB/s,
- Sequential Write: 6000 MB/s,
- Random Read (IOSP): 800000 IOPS,
- Random Write (IOPS): 1000000 IOPS,
- TBW (Total Bytes Written): 1275 TB.
Should be enough to max out our rig.
Putting things together
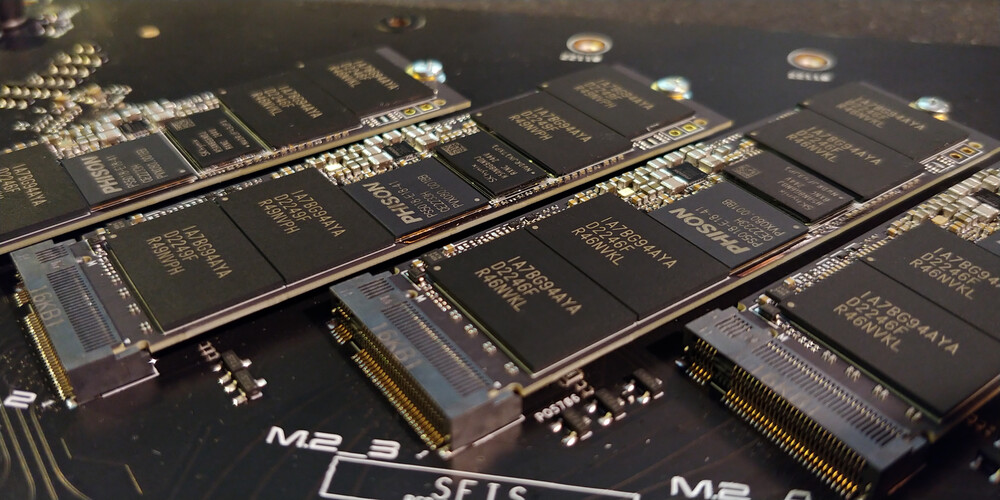
Assembling the PCIe card and NVME drives:
Configuring the motherboard (BIOS/UEFI)
In this section we will configure the BIOS/UEFI.
Flashing the new firmware
The first and most important thing to do when working with a new equipment is updating the firmware. You should always carefully read release notes and update the firmware before starting any configurations.
This will save you many incompatibility problems and eliminate potential serious issues that may even lead to hardware destruction (as was in the Samsung's NVME drives case).
Tuning CPU and RAM
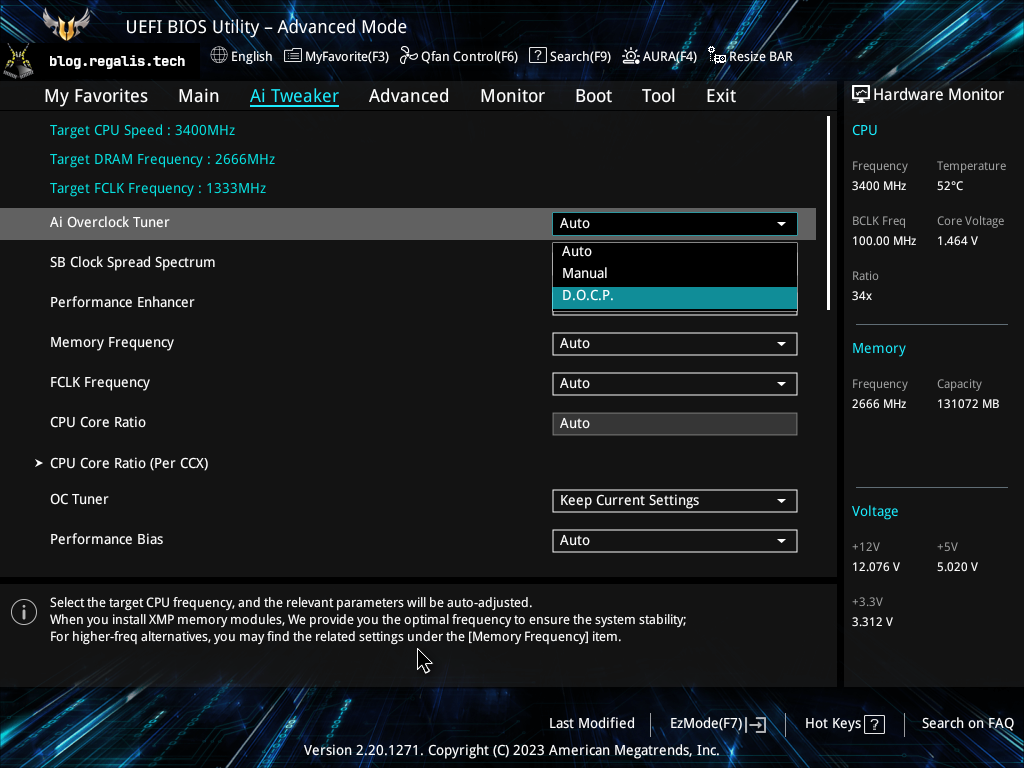
Let's start with the RAM configuration, we must enable the DOCP (Direct Overclocking Profile) profile in order to fully use the potential of our RAM. After installing new RAM (and probably after updating the BIOS/UEFI) - the CPU and memory will start with the slowest possible settings.
Go to AI Tweaker -> Ai Overclock Tuner and select D.O.C.P:
The one and only Noctua NHD-15 gives me the power to slightly tune my CPU so I can't resist. 😇 Setting all core clocks to 4.5GHz is a good starting point for my workloads - it allows me to keep CPU temperatures below 65 degrees while still being able to compile the whole operating systems on all cores for hours.
I have changed the following options (suitable only for Ryzen 9 5950X):
CPU Core Ratio: 45.00,VDDCR CPU Voltage: Manual,VDDCR CPU Voltage Override: 1.18125.
Note on CPU overclocking
Please note that this step is 100% optional and will not affect the final result as it comes to storage speeds.
Enabling PCIe bifurcation
Go to Advanced -> Onboard Devices Configuration -> PCIEX16_1 Bandwidth
Bifurcation Configuration and select PCIe RAID Mode.
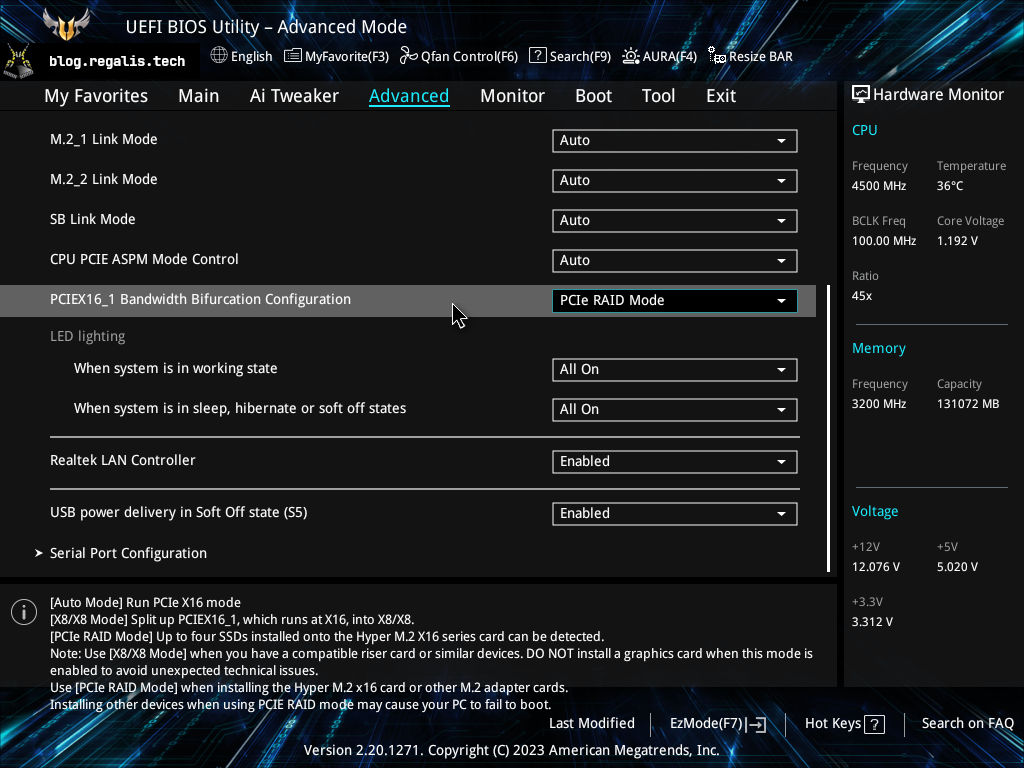
Please note that this setting does not enable any built-in RAID mode (aka Fake RAID). In my opinion, this option is named incorrectly. What this option actually does is splitting the full x16 slot into the four separate x4 enabling us to use all of our four NVME drives.
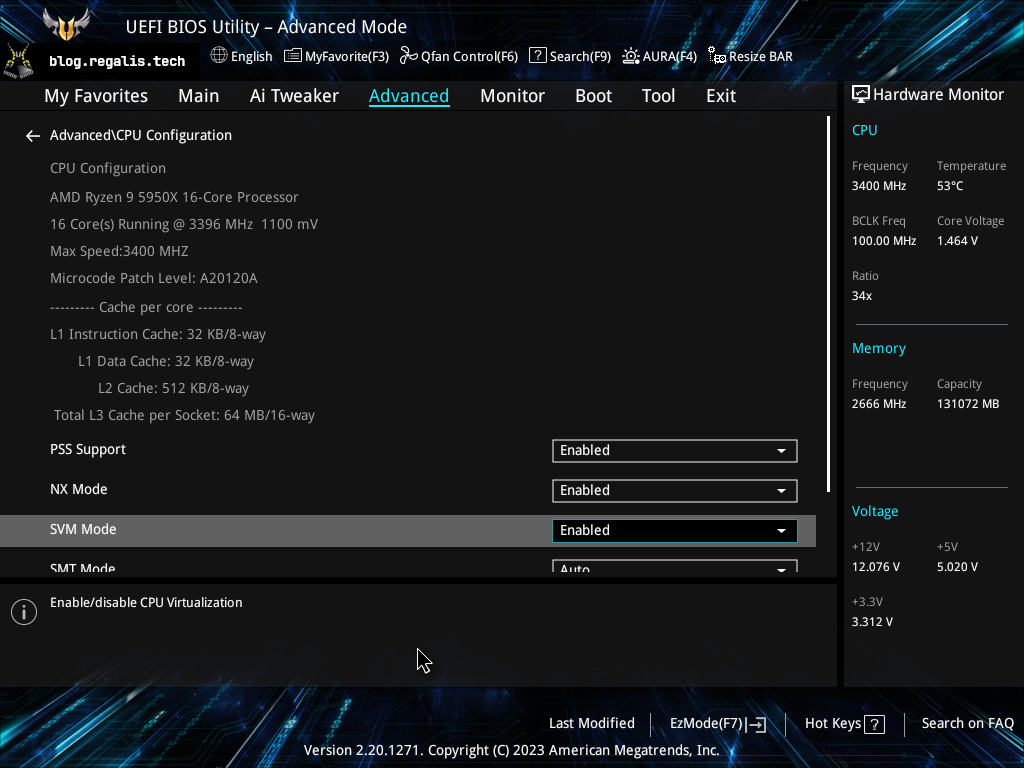
Enabling virtualization support
Go to Advanced -> Advanced CPU Configuration -> SVM Mode and select
Enabled to enable CPU virtualization.
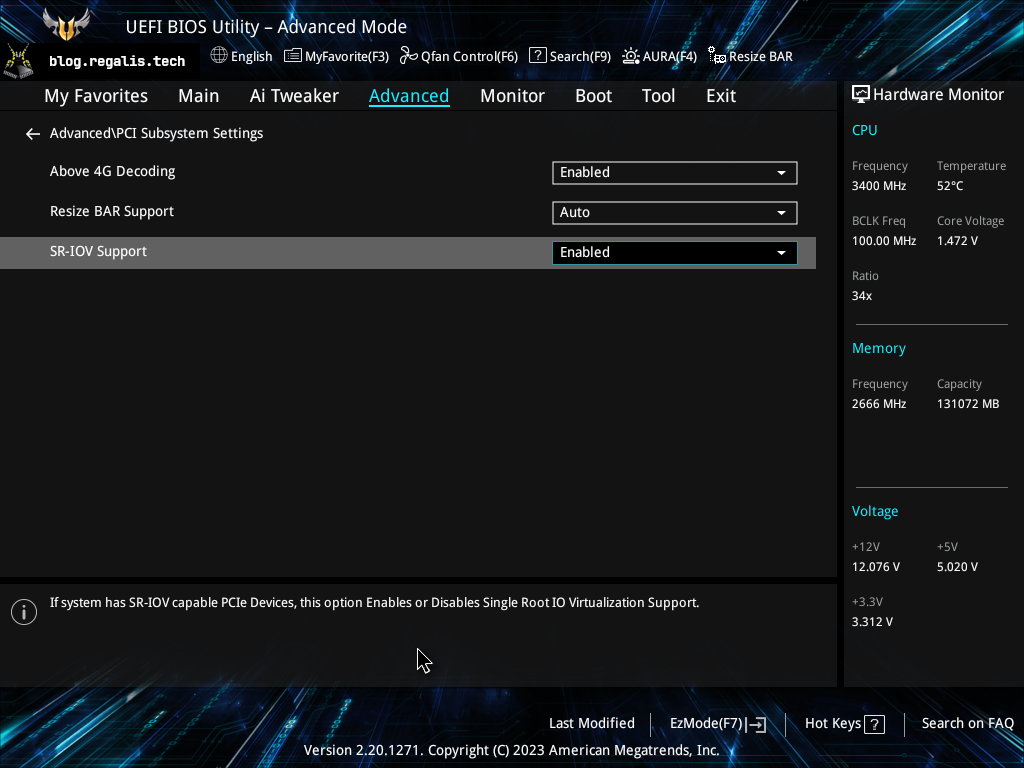
I am going to use network/GPU passthrough/virtualization so I also need to change the PCI subsystem settings.
I have changed the following options:
Above 4G Decoding: Enabled,SR-IOV Support: Enabled.
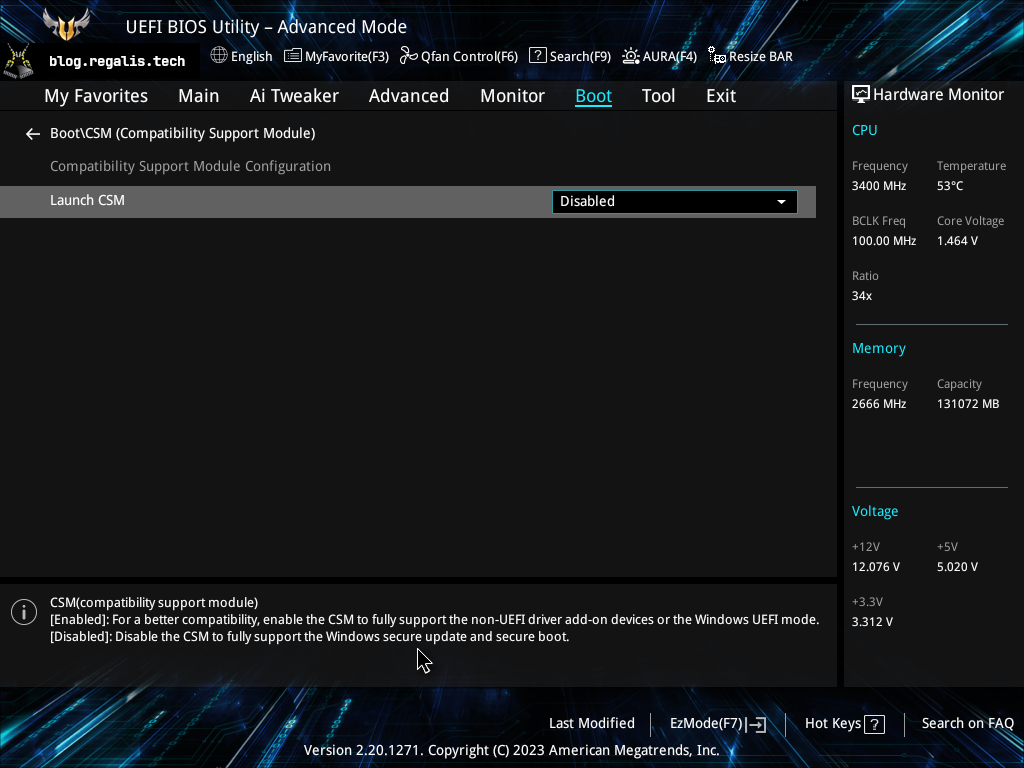
Disabling CSM
We are going to configure this system with full disk encryption (including
encryption of the /boot partition), this option is only available in UEFI
mode so we can completely disable the Compatibility Support Module (CMS).
CSM is a component of the UEFI firmware that provides legacy BIOS compatibility. It is useful for booting an old operating system or some specific OSes like those prepared by disks manufacturers to provide the universal way to update the firmware.
Go to Boot -> CSM (Compatibility Support Module) -> Launch CSM and select
Disabled.
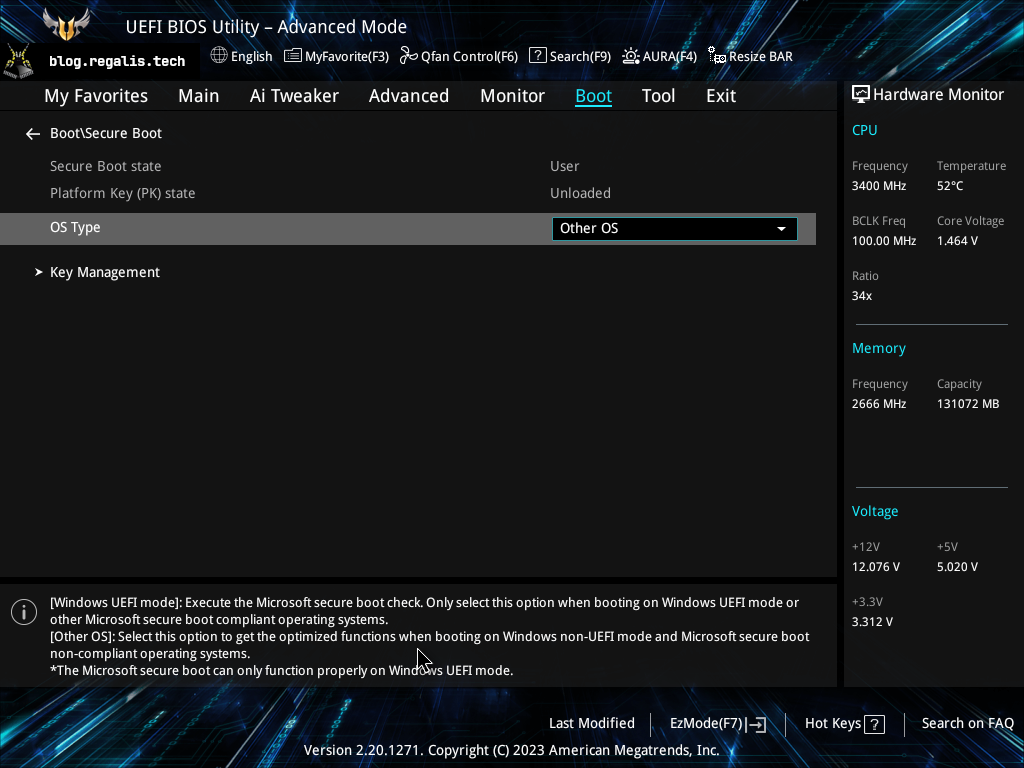
Make sure that Secure Boot is disabled and OS Type is selected as
Other OS.
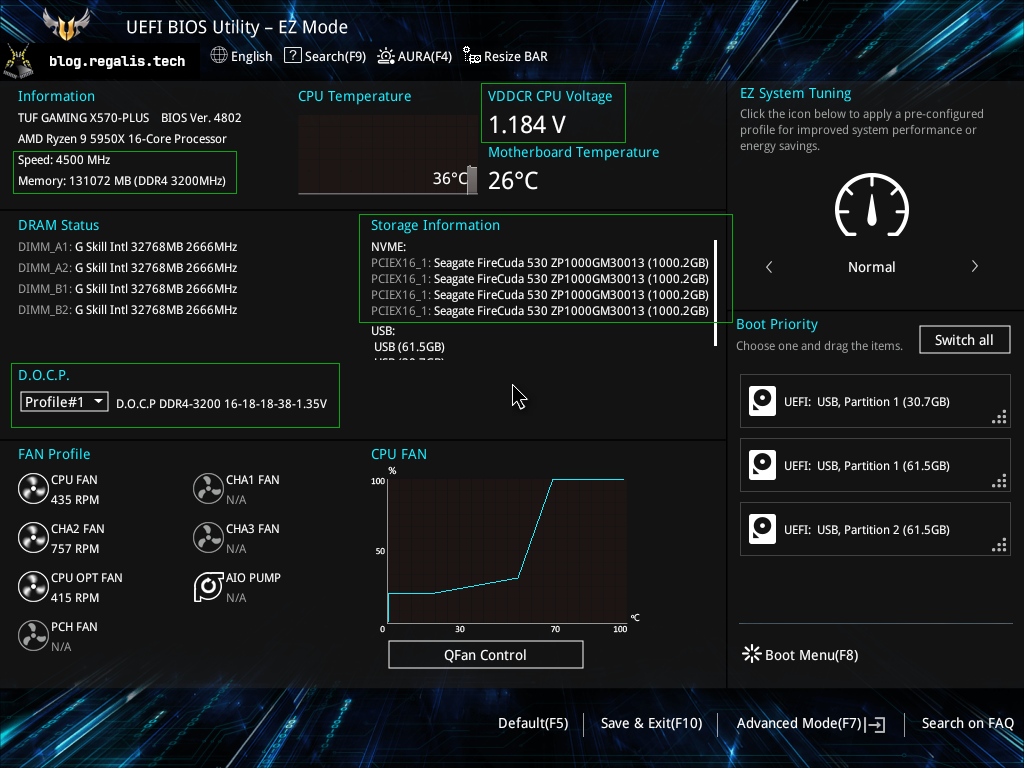
Final state
After rebooting - you should be able to see all four NVMEs. Also, please verify that you are running at your desired clocks and voltages (for both CPU and RAM):
Booting GNU/Linux - LiveCD
It looks like it's time to boot a LiveCD and run some initial tests.
But before we start, there is one more very important thing
For many years I have been professionally involved in building Free (as in freedom), independent and stable IT infrastructure. Recently I have also been teaching and running courses on advanced use of GNU/Linux systems (in Cracow, Poland).
Over the years, I have encountered data centers that were so badly configured (in terms of storage) that it was beyond my imagination. Seriously. I've seen very expensive servers packed with dozens of SSDs, surrounded by completely pointless hardware - all "designed" to run at less than 10% of the achievable storage speed. It all happened inside companies that work in the IT industry on a daily basis. It really looked as if it had been possible to make an environment several times faster, less complicated (and therefore more stable) for much less money.
Some very important facts and rules, or simply... how not to become a monkey 🐒:
- Before starting any configuration - determine and write down the expected results. This is very important to know what to expect before you start. Without it - how would you know that you hadn't screwed something completely? When you buy four NVME drives, each capable of reading sequential data at ~7 GB/s, the overall expected result is to read files at around 28 GB/s. This requires many things to be done right - configuring the BIOS/UEFI, preparing the drives (setting the appropriate phisical sector size), configuring RAID, setting a proper chunk size, configuring the filesystem and so on. You need to verify the results after an each step.
- Don't count on others, especially on ready-to-use boxed solutions. When it comes to storage - you can't count on universality, each use case is different.
- Don't believe in myths. There is a belief that "software RAID" is a bad thing. They say that we should instead use a "dedicated hardware solution" such as Synology. But guess what... Under the hood, Synology uses Debian GNU/Linux and configures standard in-kernel, software RAID. The only reason someone calls this solution a "hardware RAID" is because it is sold in a closed housing. Don't believe the marketers! Check the facts! Buying a "hardware RAID" to get a generally pre-configured, suboptimal device with an extremely outdated Debian GNU/Linux operating system, plus buying network cards and switches and thus complicating the infrastructure - this is the perfect way not only to become a monkey, but also to witness the magic 10% result when it comes to performance.
- The right results don't just happen by accident. Only bad results do that. If you feel uncomfortable while configuring a given element, be prepared to step back for a while and catch up on your knowledge. It will all pay off.
- Taking the time to understand how it works allows you to become independent in creating complete, stand-alone solutions. On the other hand, relying 100% on ready-to-use, proprietary solutions leads to a situation in which such people are unable to perform even the simplest task on their own. This is exactly the situation that on a larger scale - leads to a technological enslavement.
- GNU/Linux is everywhere and powers the most critical elements of human infrastructure. It gives freedom, independence, stability and allows to move forward without the need of being chained to some big company (or to your credit card). GNU/Linux is the only one that gives you complete, unique control over each and every element.
Booting Arch Linux
I have been using Arch Linux for all kinds of operations related to system installation, troubleshooting, and performance measurement since ever. Arch usually has the latest packages and is very well equipped with the basic tools for any type of work like this.
First of all, let's verify that the system detects all of our NVME drives:
1 2 3 4 5 6 7 | |
So far so good.
Preparing the NVME drives
Once again, before you begin - please update the firmware of your NVME drives. Skipping this step may result in a faster disk wear (which is exactly what happened in the case of the previously mentioned Samsung).
Updating NVME firmware with GNU/Linux
The process of updating a firmware will be explained in a dedicated article.
LBA
NVME disks have something called a namespace, which is simply a set of logical
block addresses (LBA) that are available to the host (in our case - to the
Linux kernel). One physical NVME disk can consist of multiple namespaces. A
namespace ID (NSID) is an identifier used by a controller to provide access to
a namespace.
In Linux, namespaces appear each with a unique identifier in devices;
/dev/nvme0n1 is simply the namespace 1 of controller 0).
Since we have four NVME drives (each with a single controller) with a single namespace on each on them - the kernel has exposed to us four devices:
/dev/nvme0n1,/dev/nvme1n1,/dev/nvme2n1,/dev/nvme3n1.
Very important attribute of a NVME drive is the LBA format. This is exactly
the point from which the kernel takes information about what the optimal size
of commands to sent to the namespace is.
Most standard filesystems use 4k as a block size which means each IO
operation issued to the filesystem will perform a read/write of size 4k. What
happens if the disk uses block sizes of 512b? You guessed it, the drive will
have to do eight independent reads in order to return a single 4k block.
As you can imagine - this can cause huge performance losses.
Unfortunately, most standard drives come preconfigured with the LBA format set to 512b, even though they also support 4k. It's all due to compatibility problems with Windows systems 🐒.
How to check supported LBA formats for a given disk? We can use the nvme utility:
1 2 3 4 | |
As you can see - our Seagate NVME drive supports both 512b and 4k formats
and the one being currently in use is the 512b. At this point we have a great
opportunity to shoot ourselves in the foot - by leaving this format as 512b
(default state). Changing the LBA format later without losing data is impossible.
Let's change the LBA format to 4k for all of our drives:
1 2 3 4 5 | |
Let's verify this step:
1 2 3 4 5 | |
Verify the PCIe link status
We need to make sure that all our NVMEs are running at full speed, which means we use PCIe 4.0 instead of PCIe 3.0 and we use all four available PCIe lanes (x4).
We can use lspci to obtain information about the PCIe devices, let's find our NVME drives:
1 2 3 4 5 | |
In order to show show more details we can use -vv flags of the lspci
utility. We can filter the device(s) with the -s option, for example to show
details about our first NVME drive we can use lspci -s 0a:00.0 -vv.
Since we are interested in PCIe link details, we can use grep to filter it:
1 2 3 4 5 6 7 8 | |
That is information about the capabilities of our endpoint device. As you can see our NVME drive supports speeds from 2.5GT/s (PCIe 1.0) to 16GT/s (PCIe 4.0) and is equipped with four PCIe lanes.
Another important information is where the device is connected to. We
can use lspci -tv to display a tree-like diagram containing all buses,
bridges, devices and connections between them:
1 2 3 4 5 6 7 8 9 10 11 12 13 14 15 16 17 18 19 20 21 22 23 24 25 26 27 28 29 30 31 32 33 34 35 36 37 | |
We can see a single Root Complex and a Host Bridge (at 03.0), our first
NVME drive is connected to the first port of that bridge (03.1) and so on.
Let's find out information about the 03.1 slot:
1 2 3 4 5 6 7 8 | |
As you can see in the LnkSta the port is configured as 16GT/s (PCIe 4.0)
and has four lanes (x4).
An example of bad configuration
If you happen to notice that your disk reports "downgraded" link status like this:
1 2 3 4 5 6 7 8 | |
This is probably because it is connected to the port with lower speed (for example to a PCIe 3.0):
1 2 3 4 5 6 7 8 | |
In this case - the speed of the NVME drive will be cut in half. I have seen too many cases like this.
There may be a lot of reasons for this situation:
- incorrect BIOS/UEFI configuration,
- you connected the device to the wrong port,
- your CPU does not support PCIe 4.0,
- the motherboard's manufacturer designed the motherboard in this way,
- you let the 🐒 configure your hardware.
Initial performance tests
Let's install the powerful tool for measuring performance of storage devices -
fio (Flexible I/O Tester ).
1 2 3 4 5 6 7 8 9 10 11 12 13 | |
Let's measure the performance of a single NVME drive:
1 2 3 4 5 6 7 8 9 10 11 | |
Understanding fio's options and output
Fio will be explained in details in the following articles in this series.
Here are my results:
1 2 3 4 5 6 7 8 9 10 11 12 13 14 15 16 17 18 19 20 21 22 23 24 25 26 27 28 29 30 31 | |
For now, we can see that a single process can successfully perform a direct (without any buffering) read of randomly selected 32-kilobytes blocks of data from a single NVME drive with a constant, stable bandwidth of 7491 MB/s issuing 229k operations per second.
Here are my results for all common block sizes (running single process on a single core):
| block size | IOPS | bandwidth |
|---|---|---|
| 4k | 420k | 1721 MB/s |
| 8k | 341k | 2794 MB/s |
| 16k | 305k | 4996 MB/s |
| 32k | 229k | 7486 MB/s |
| 64k | 115k | 7509 MB/s |
| 128k | 57.3k | 7515 MB/s |
| 256k | 28.7k | 7514 MB/s |
| 512k | 14.3k | 7515 MB/s |
| 1m | 7.1k | 7514 MB/s |
To measure the maximum number of I/O operations the drive can handle, we need
to run multiple instances of these tests in parallel. This should be easy since
fio has a dedicated option for this called --numjobs.
Let's check how many random 4k blocks we can read when trying from 16 processes at once:
1 2 3 4 5 6 7 8 9 10 11 12 13 14 15 16 17 18 19 20 21 | |
But what about reading from all of our NVME drives at once? We can pass more
devices to the fio's --filename option and run multiple jobs in parallel, for
example:
1 2 3 4 5 6 7 8 9 10 11 12 13 14 15 16 17 18 19 20 21 22 23 24 25 26 27 28 29 30 31 32 33 34 35 36 | |
Looks great, we are hitting 29.9 GB/s from all NVMEs 🚀🚀🚀.
The output of the iostat program from the time when fio was running:
1 2 3 4 5 6 7 8 | |
Therefore, we have a proof that our configuration allows parallel reading from all disks, stably reaching approximately 30 GB/s of bandwidth.
This is in line with our expectations - so far we have done everything right.
Here are the test results (all were run with the --numjobs=16 option).
| block size | IOPS | bandwidth |
|---|---|---|
| 4k | 5556k | 22.8 GB/s |
| 32k | 914k | 30.0 GB/s |
| 256k | 115k | 30.0 GB/s |
| 512k | 57.2k | 30.0 GB/s |
| 1m | 28.5k | 30.0 GB/s |
I would like to make it clear that we will achieve exactly the same results with the Ryzen 5600X processor.
If an ordinary PC is able to achieve bandwidth of 30GB/s and more than 5 million IOPS - imagine what a professional server can do... And on the other hand - how much of the server's potential can be wasted if a series of mistakes are made during configuration. The "worst" is yet to come because we have to configure RAID properly and all the filesystems to be able to maintain these speeds. Several layers are waiting for us.
Summary
This is the end of the first part. In the next articles I will cover several elements:
- useful utilities to measure performance (including
fio,iostat,dstatetc.), - partitioning,
- preparing RAID, testing performance of multiple RAID configurations,
- preparing filesystems,
- performing a manual Debian GNU/Linux installation,
- performing a manual Debian GNU/Linux installation with full disk encryption for multiple users with the ability of unlocking volumes with multiple FIDO USB keys,
- compiling the whole system from scratch - performing a manual Gentoo GNU/Linux installation for maximum performance.
Final result